
Your iPad, DeepDish GigBook, & Search
-Find Tunes Fast-
To Search quickly will always be an important skill when you’re not playing from a set list.
Each month the SBB newsletter will have a lesson on using DeepDish GigBook on your iPad. These "step-by-step" guides will be posted here so you can review at any time..
Below this intro section, you will see an image of instructions identical to what you saw in the newsletter. Below that, there is a section with additional details about the steps that may be helpful to some, but confusing to others. Sometimes this lower section may mention alternate methods or views. If the lower section is confusing, ignore it! Stick with the simpler Newsletter View. You might, however, find an explanation for something that puzzled you in the Summary view.
This month, I will walk you through the "Best practice” method of using "Search." The explanation for searching makes this seem far more complex than it really is. Truly, it is simple! Essentially, the instruction is,
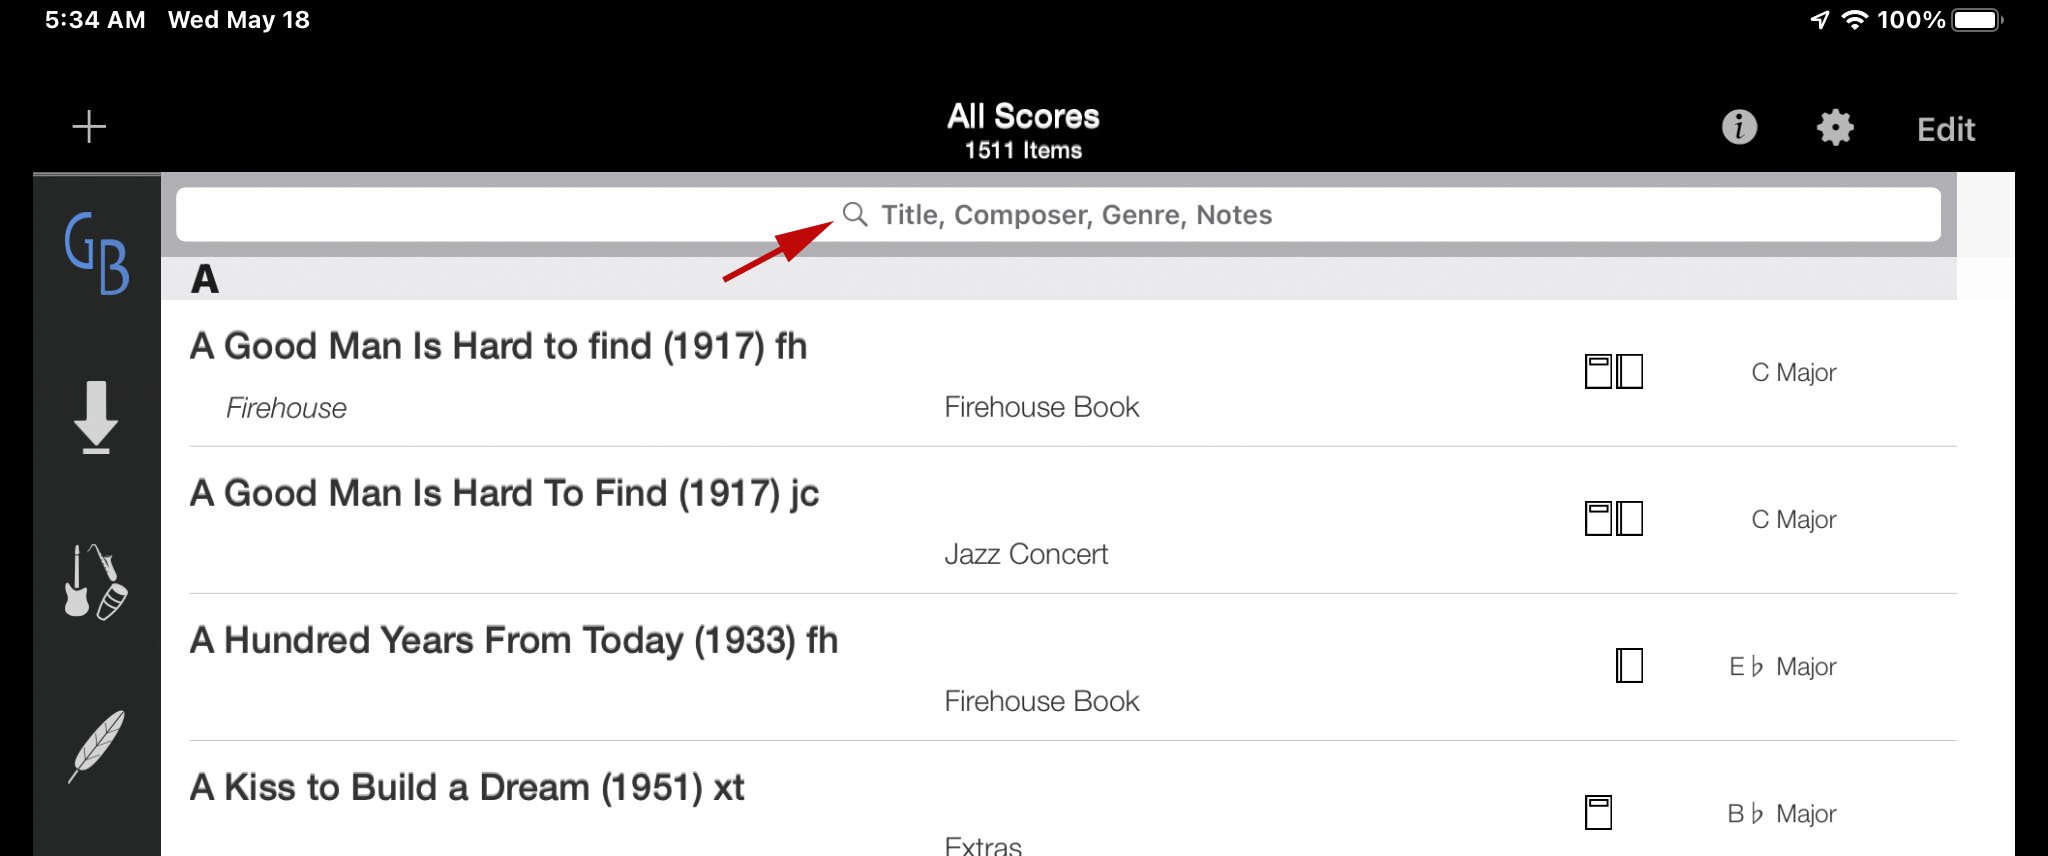
"In ‘All Scores’ view, pull down to reveal the search bar, and type in your search word." That’s it!
Use these Search steps every time you play or practice, & it will soon become second-nature, and quite fast.
Disclaimer: Although the images of the GigBook screen will look exactly like yours, the contents in the center will not. Your screen will show the content of your own GigBook.

If you need additional help or clarification, send email to Bev Anderson . Click here to go to Lesson 2-Create a Set List.
Below here you can read additional details about the steps in this lesson. Step Numbers below will correspond to the above informational image, so refer to that if you need to for clarification.
Best Search practice, additional details referring to the Summarized Lesson above:
Step 1. To search through all of your tunes, you MUST be in the Main All Scores ….[Additional info] If you are in a Binder that you created, the Search will only search that Binder, leading you to believe that you do not have the searched for tune. If you have multiples of the same tune, a Binder search could be your best practice, but only if you are scrupulous in keeping the Binder up to date. For instance, a Binder you create for SacBanjo may have had all your Banjo Band tunes initially, but you may forget to put new tunes into the Binder. A Search done while viewing that Binder will NOT reveal those new tunes, because they are not inside the binder. (We will have future lessons for “Binders,” after we do “Set Lists.”) Do an “All Scores” search before before downloading the tune so you don’t get duplicates.. The advantage of a Binder search comes into play when you have multiples of the same song on your iPad, perhaps from different sources, or in keys that you don’t normally play. Your “All Scores,” search may reveal multiples of that title in the results window, & may slow you down while you select the correct version. (A later lesson will show you how to identify & safely delete duplicate music sheets.)
Step 2. You must be at the top of your songs list. ….[Additional info] If you are down further in the alphabetical list when you decide to do a search, you can scroll back up to the top, but that is pretty slow if you just finished opening something like “ Under the Double Eagle.” Simply touch the small A on the Right side of your screen. This will automatically take you to the top. If you have a couple of songs that start with something other than A, (e.g. the song ‘S Wonderful), the A will still take you to the top, or touch whatever is the uppermost thing just above that A.
Step 3. .Pull down in the Grey Bar to Reveal the Search Bar Field, illustration below . [Additional info] “Pull down” means to place your finger at the location and slide it downward, sometimes referred to as “click and drag.” When you first reveal the Search Bar, (see illustration below) you’ll see a small magnifying glass and words that show what categories you can search. I’ve found that searching for words you used in a Note is not particularly accurate, but if you make notes (a much later class) it might be useful.
Step 4. Touch anywhere in this Bar to start typing your search words. ….[Additional info] The keyboard will show at the bottom of your screen as soon as you touch in this space.
Step 5. Touch your Tune Title to open it…. [Additional info] As you type, you will see your song list shorten to show only tunes that contain what you have typed. As soon as you see your tune in the list, stop typing…. Continuing to type the full word or title once you see your tune in the list just a waste of your time.
[More info] These 3 things are The Most Important to remember about using the Search feature:
Be sure to choose a word from the title that is not used in 10 other songs, especially, never use “the.”. You will get better at this with practice.
Be sure you can spell the word correctly; for instance, I always type Araby not sheik, (or is it shiek?).
Do not choose a word with punctuation. Sometimes songs with the same title may, or may not, have the same punctuation (don’t vs dont, errors happen). Hyphens can also be problematic. Is there a space before or after the hyphen? If the space is wrong, you won’t find what you are looking for. Capitalization does not matter. Commas, or the lack thereof, can really trip up a search (e.g. Searching for Music, Music, Music) Until you type the comma, your list may be too long to be helpful; leave out the comma in your search, ( i.e. music music) and this tune won’t show up at all.)
Also under Step #5. When you are finished playing your selected tune, touch Done as you are used to… ….[Additional info] If you don’t see the Done, touch the middle of your song sheet & it will show in the upper left. (If this is unresponsive, ‘Force close’ the app by double-clicking your home button, and sliding the app window up to the top of your screen. Then restart the app.) Touching Done will take you back to the Search view, ready to go to Step 6 for a new tune. If you are done Searching, Click Cancel (to the right of the x) to close the Search Bar.
Step 6. Touch the X in the search bar to delete your current search word ….[Additional info] Clicking the X only removes your typed in words, leaving you ready to type in a new word. It does not close out the Search bar. (ClickX, then type.) Using this method makes searching for songs almost as fast as using a Set List. With practice, you’ll find your song in seconds! Do not click on the word ‘Cancel’ if you wish to continue searching for additional songs; it will slow your searches down appreciably, because you will have to repeat steps 3, and 4 before being able to type your search words.